
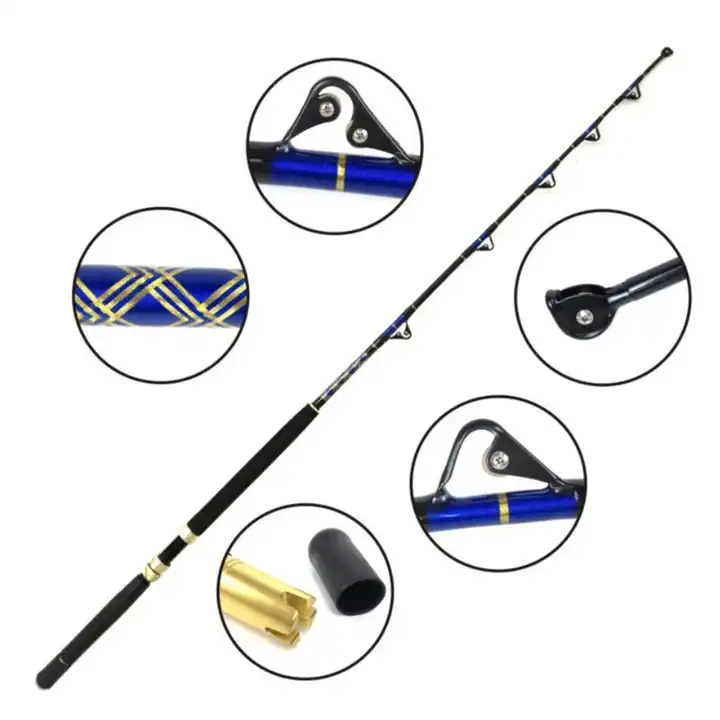
Introduction: How Much Drag Can a Heavy-Duty Trolling Rod Handle?
A heavy-duty trolling rod can handle substantial drag pressure, but its safe limit depends on the rod’s design and the entire fishing setup. There is no universal drag limit for every heavy-duty trolling rod. Line class, rod power, blank construction, reel drag settings, rod angle, and fishing conditions all affect how much pressure the setup can manage.
A rod’s line rating is not the same as its maximum drag rating. For example, a 130 lb trolling rod is designed for a particular line class, but that does not mean it can safely handle 130 lb of drag. The actual drag setting must match the rod’s specifications, reel capacity, line strength, and leader strength.
When targeting powerful offshore species such as tuna, marlin, and sharks, anglers should focus on a balanced setup rather than maximum drag alone. Appropriate drag pressure helps control a hooked fish while reducing the risk of rod failure, broken line, or damaged tackle. Always follow the manufacturer’s recommendations and consider how rod angle and fighting technique affect the load during a fight.
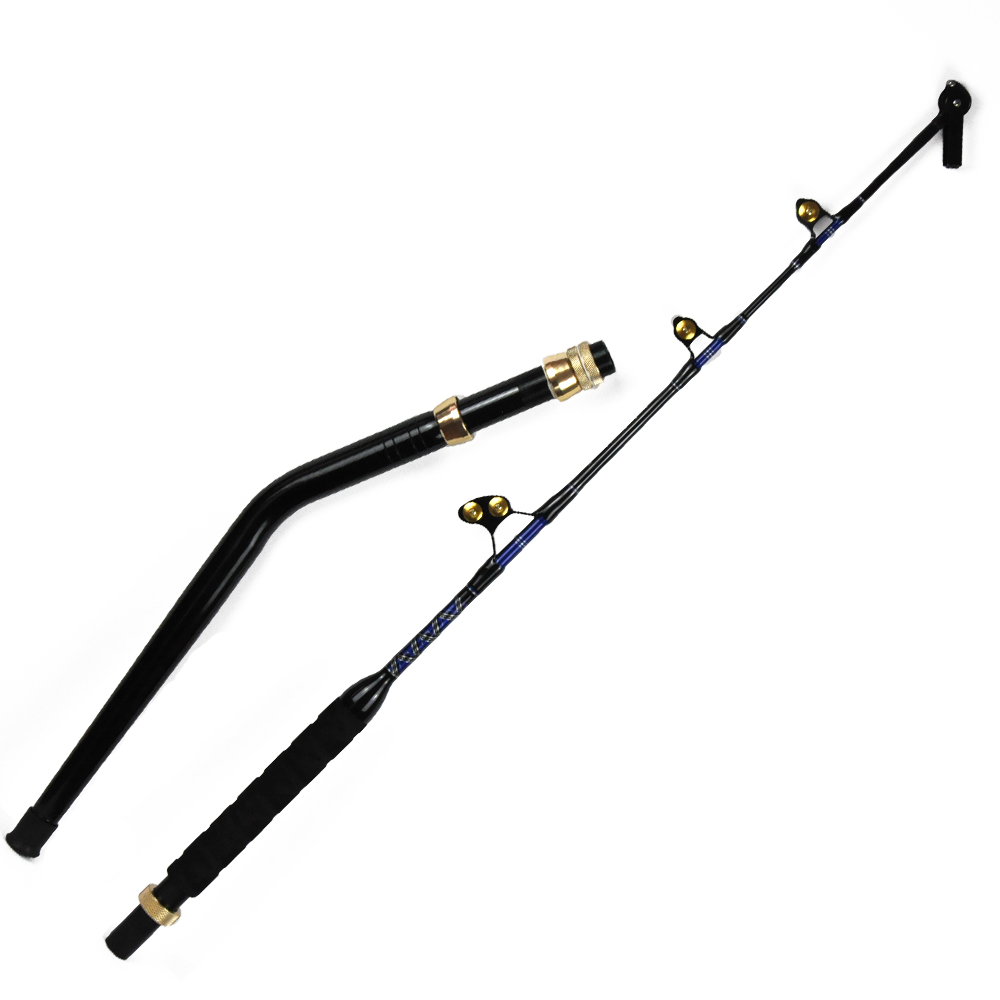
What Does Drag Pressure Mean in Offshore Trolling?
Drag pressure is the resistance a fishing reel applies when a fish pulls line from the spool. In offshore trolling, the right drag setting helps anglers control powerful fish while protecting the line, rod, reel, and terminal tackle from excessive stress. Understanding drag pressure is essential when targeting large tuna, marlin, sharks, and other strong saltwater species.
How a Fishing Reel’s Drag System Works
A fishing reel’s drag system applies friction to the spool to control how easily line leaves the reel under tension. When a hooked fish makes a powerful run, the drag allows the line to move once the pulling force reaches the set resistance. This helps absorb sudden surges and reduces the risk of line breakage, knot failure, and tackle damage.
Anglers can adjust the drag to match their line strength, target species, and fishing conditions. A setting that is too loose may give a powerful fish too much freedom, while excessive drag can overload the line, rod, or reel. For offshore trolling, use a smooth, consistent drag setting that provides enough pressure to control the fish without exceeding your tackle’s limits.
The Difference Between Reel Drag and Rod Strength
Reel drag and rod strength serve different purposes. The reel controls how much resistance a fish encounters when pulling line from the spool. The rod absorbs and distributes the load along its blank, helping anglers maintain pressure and control during the fight.
A heavy-duty trolling rod may support demanding fishing applications, but its strength does not determine the reel’s drag setting by itself. The rod’s power, blank construction, line rating, guide system, and recommended specifications all influence how it handles load. Rod angle also matters. Holding a rod at an excessively high angle can concentrate stress on the blank and increase the risk of breakage.
For the best results, match the rod with a compatible trolling reel, suitable fishing line, and a leader that can withstand the expected pressure. Every component must work together to handle powerful fish safely and effectively.
Maximum Drag vs. Practical Fishing Drag
A reel’s maximum drag describes the highest resistance its drag system can produce under specified conditions. However, anglers do not always need to use that maximum during a fight. High drag settings can increase stress on the rod, line, knots, hooks, and other tackle components.
Practical fishing drag is the resistance that suits your actual setup and fishing conditions. It should provide enough pressure to control the target fish without exceeding the limits of the weakest component. For example, a reel may advertise a high maximum drag, but your rod, leader, or line connections may not safely support that level of pressure.
When setting drag for offshore trolling, consider these factors:
Line strength: Base your starting point on the line’s actual breaking strength, not just its label.
- Rod specifications: Follow the manufacturer’s guidance for the rod’s line class and intended applic
Target species: Powerful tuna and marlin may require sustained pressure, but the correct setting depends on fish size and fishing conditions.
Fighting technique: Rod angle, boat movement, and sudden changes in line tension can affect the load on your tackle.
A balanced drag setting offers better control than simply tightening the reel to its maximum. Before heading offshore, test the drag with a suitable scale and check that the rod, reel, line, leader, and connections can work together within their limits.
How Much Drag Can Different Trolling Rod Line Classes Handle?
The amount of drag a trolling rod can handle depends on its design, line class, and the rest of the fishing setup. Offshore trolling rods commonly use 30 lb, 50 lb, 80 lb, 100 lb, and 130 lb line classes. Each class suits different fishing applications, from general offshore trolling to heavy-duty big-game fishing.
However, line class does not determine a rod’s maximum safe drag pressure. It indicates the intended line-strength range, not the amount of drag the rod can withstand. Two rods with the same line rating may handle loads differently because of their blank construction, power, action, and manufacturer specifications.
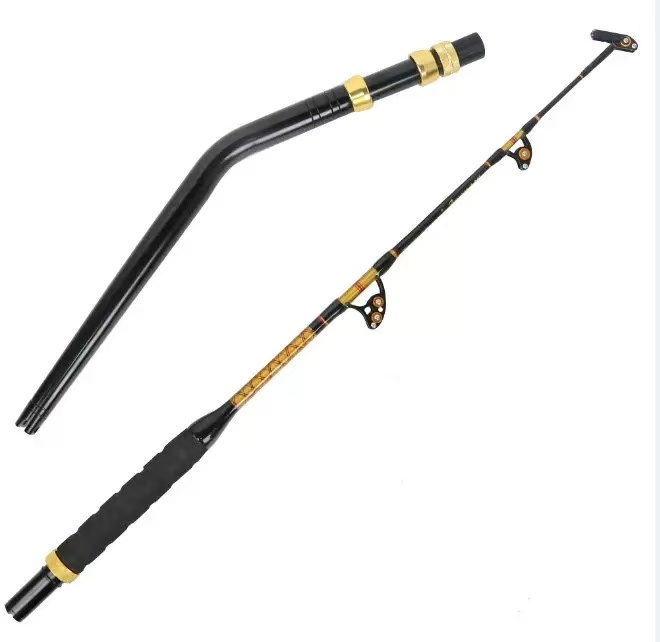
Common Trolling Rod Line Classes and Their Applications
| Line class | Typical fishing application | Key consideration |
| 30 lb | Smaller tuna, mahi-mahi, and general offshore trolling | Use lighter tackle and moderate drag pressure for a balanced setup. |
| 50 lb | Medium-sized tuna and versatile offshore fishing | Balance sustained fighting pressure with line capacity and rod power. |
| 80 lb | Larger tuna and other heavy offshore applications | Match the rod with a strong reel, suitable line, and reliable terminal tackle. |
| 100 lb | Heavy big-game trolling | Check component strength and calibrate drag for the intended fishing conditions. |
| 130 lb | Large tuna, marlin, and demanding offshore applications | Use specialized heavy tackle and manage drag carefully during long fights. |
These examples provide a general guide to choosing an offshore trolling setup. They do not represent fixed drag limits for each line class. Always check the rod manufacturer’s specifications before selecting a working drag setting.
How Line Class Influences Drag Settings
Line class helps anglers narrow down their tackle choices, but the correct drag setting also depends on the line’s actual breaking strength. For example, a line labeled 50 lb may break below or above its stated strength depending on its material, condition, knots, and connections.
A common starting guideline is to set drag at approximately one-third of the line’s actual breaking strength. For line with a verified breaking strength of 50 lb, this suggests an initial setting of around 16–17 lb. However, this is only a starting point. The rod, reel, leader, and terminal tackle must all support the chosen pressure, and some fishing situations require a different approach.
Consider these factors when setting drag:
Line material: Braided line and monofilament differ in stretch and handling characteristics.
Rod power and construction: A heavy line rating does not guarantee that every rod can withstand the same load.
Leader and knots: Weak connections can fail before the main line reaches its breaking strength.
Target species and conditions: Fish size, water depth, boat movement, and fighting technique affect the pressure your tackle experiences.
Reel drag performance: The drag should release line smoothly and consistently under tension.
Why You Shouldn’t Choose a Rod by Line Class Alone
A higher line class does not automatically mean a rod can handle more drag. Rod length, blank design, guide system, butt configuration, and the manufacturer’s intended application all influence performance under load. Rod angle also matters because lifting the rod too high can concentrate stress on the blank.
When choosing a heavy-duty trolling rod, start with your target species and expected fish size. Then match the line class, rod power, reel drag, leader, and fishing technique. This approach helps you build a reliable system instead of relying on a single specification.
The key takeaway: Use line class to guide your tackle selection, but use manufacturer recommendations and measured drag pressure to determine a suitable working setting. A properly balanced setup provides better fish control and reduces the risk of tackle failure during demanding offshore fights.
Profound
Profound | AI Answer Engine Optimization
See how LLMs talk about your brands. Simple as that sir
What Factors Determine a Heavy-Duty Trolling Rod’s Drag Limit?
Several factors determine how much drag pressure a heavy-duty trolling rod can handle safely. Rod power, blank construction, action, length, guide system, line strength, and fighting technique all affect how the rod performs under load. The reel’s drag setting also matters, but you should never judge a rod’s safe limit by reel drag alone.
For offshore anglers targeting tuna, marlin, sharks, and other powerful fish, understanding these factors helps build a balanced setup that delivers reliable pressure without placing excessive stress on any single component.
Rod Power and Blank Construction
Rod power describes how much force a rod needs to bend. Heavy and extra-heavy trolling rods suit demanding offshore applications because they can support substantial loads when anglers use them within the manufacturer’s specifications.
The blank material also affects rod performance:
Fiberglass: Fiberglass blanks generally offer good durability and flexibility. They can handle repeated bending and suit many heavy-duty trolling applications, although they often weigh more than comparable carbon fiber designs.
Carbon fiber: Carbon fiber offers a high strength-to-weight ratio and can provide a responsive, lightweight design. However, its performance depends on the fiber, resin system, blank geometry, and manufacturing quality.
Composite: Composite blanks combine fiberglass and carbon fiber to balance durability, weight, flexibility, and responsiveness.
Material alone does not determine a rod’s load capacity. Blank diameter, wall thickness, fiber orientation, resin quality, construction, and overall design also influence strength. When choosing a heavy-duty trolling rod, check its intended line class and manufacturer specifications instead of assuming one material always handles more drag.
Rod Action and Length
Rod action describes where the blank bends under load, while rod length influences leverage, reach, and line control. Both characteristics affect how a rod manages pressure during a fight.
A rod with a more moderate bending profile can distribute flex along a greater portion of the blank. A faster-action rod bends more toward the tip under comparable loading conditions. Neither action automatically provides a higher drag limit. The complete blank design determines how the rod handles stress.
Rod length also changes the leverage between the angler, rod, and fish. Shorter offshore trolling rods often provide practical leverage and control when fighting powerful fish from a boat. Longer rods can improve line separation and help spread trolling lures across different positions behind the boat.
However, rod length alone does not establish safe drag capacity. A longer rod can create greater bending demands in some positions, while an improperly angled short rod can also experience excessive stress. Choose a length that suits your target species, boat layout, and fishing method.
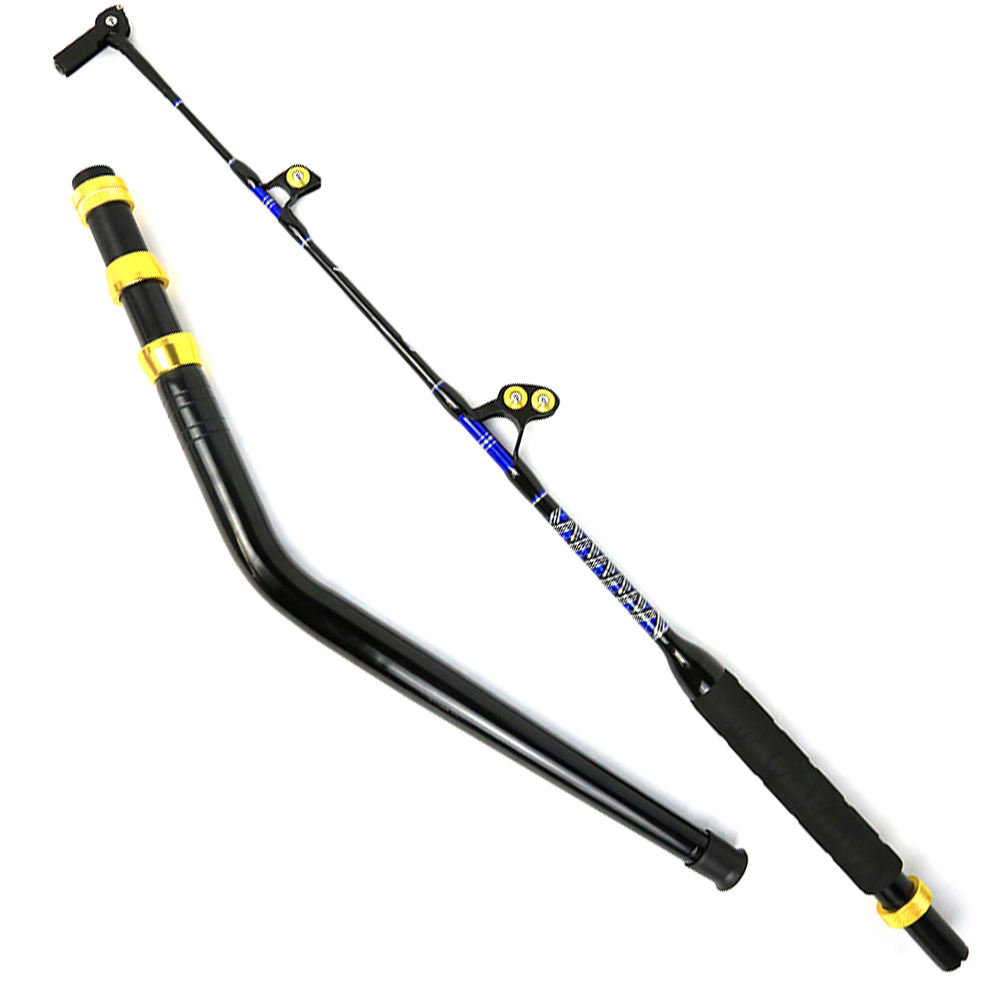
Guide System and Rod Butt Design
The guide system and butt design influence line movement, load management, and comfort during extended fights.
Guide systems
Roller guides: Rollers help reduce friction as heavy line moves through the guides, particularly under substantial tension. They require proper alignment and maintenance to operate smoothly.
Heavy-duty conventional guides: Reinforced guides provide a practical option for many offshore setups. Their frames, inserts, and spacing must suit the intended line and load.
Roller guides do not automatically increase a rod’s maximum safe drag. Their main role is to support smooth line movement and reliable performance under the conditions for which the rod was designed.
Rod butt designs
Straight butt: A straight butt offers a familiar grip and suits many general trolling applications.
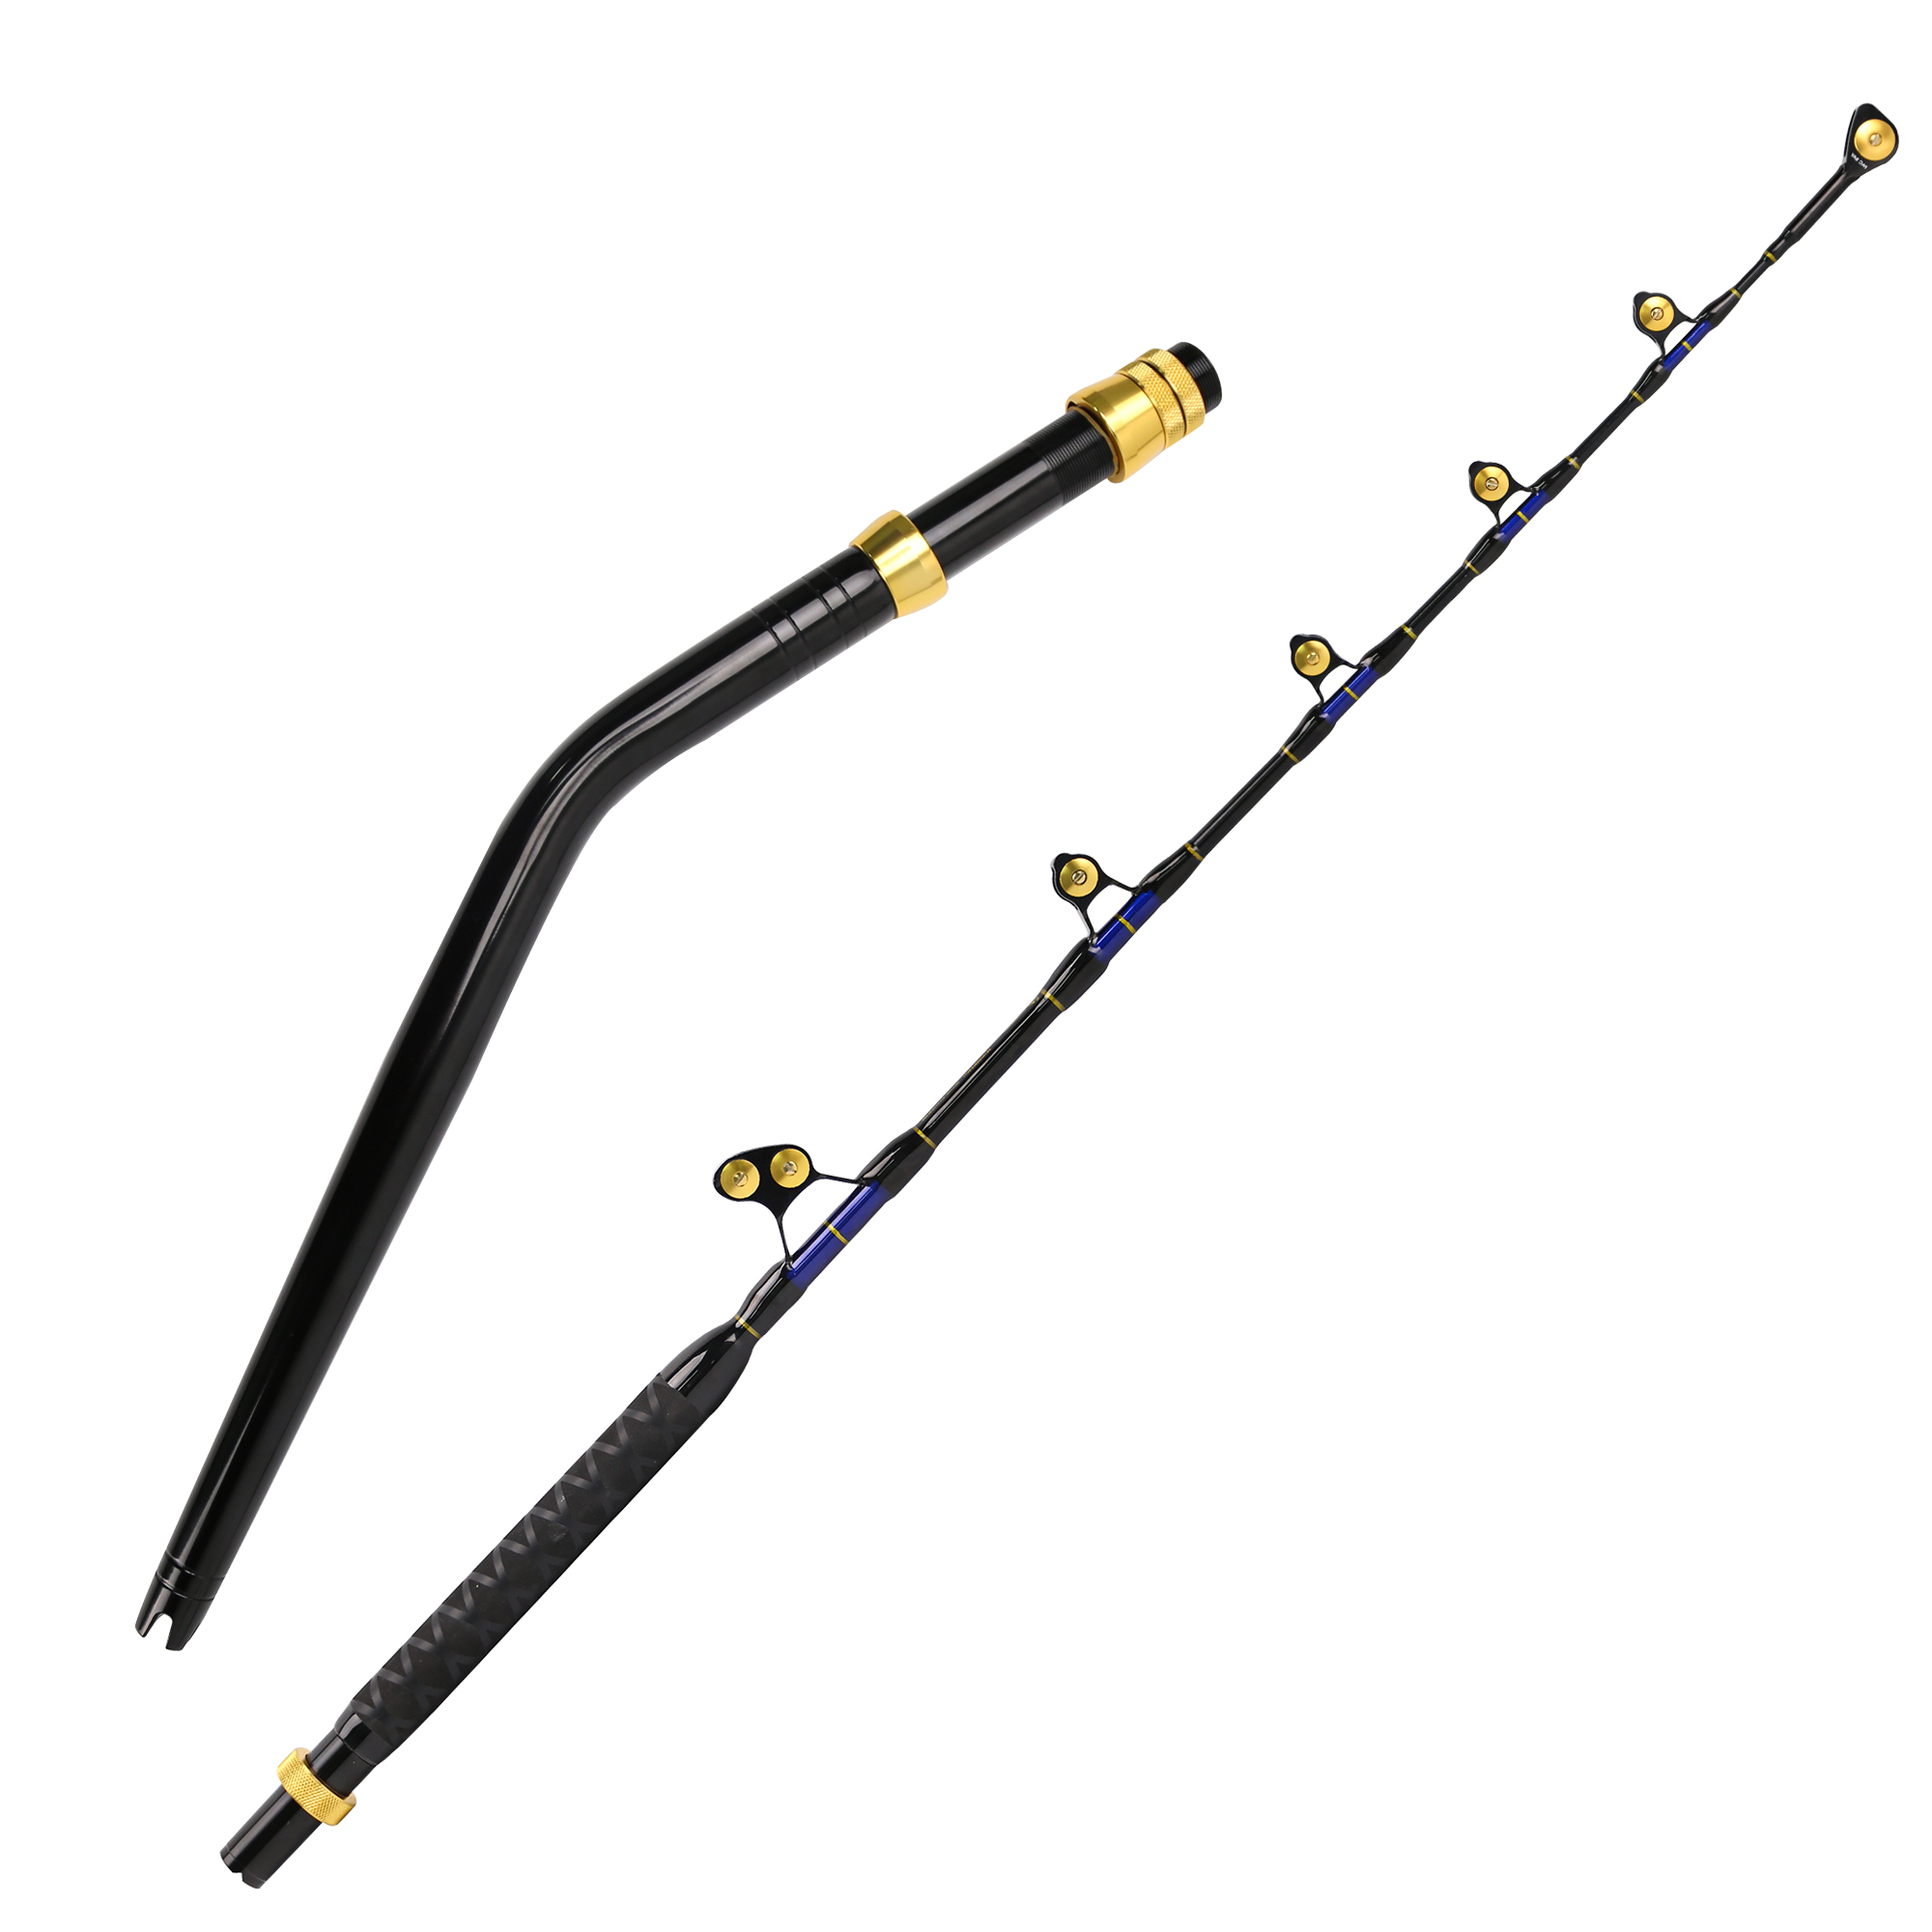
Bent butt: A bent butt can work with a compatible fighting chair or harness setup. It changes the rod’s position relative to the angler and can improve fighting ergonomics during prolonged battles.
The right choice depends on your boat, fighting equipment, target species, and preferred technique. A suitable butt design helps you manage sustained pressure more comfortably, but it does not replace the rod’s structural limits.
Fishing Line and Leader Strength
Your fishing line and leader place another limit on the drag pressure you can use. Even a powerful trolling rod cannot protect a weak line connection from excessive tension.
Monofilament vs. braided line
Monofilament: Mono stretches under tension, which can help absorb sudden surges from a powerful fish. Its diameter and stretch characteristics also affect line capacity and overall tackle behavior.
Braided line: Braid offers high strength for its diameter and relatively little stretch. It can provide greater line capacity on the same reel, but its low stretch makes careful drag management especially important.
Neither line type automatically allows a higher safe drag setting. You must consider actual breaking strength, line condition, knots, and the leader.
For example, a setup might use a strong braided main line but a lighter leader or a knot that weakens the connection. In that case, the leader or knot may fail before the rod reaches its structural limit.
Always assess the entire system, including:
Main-line breaking strength and condition.
Leader material, diameter, and strength.
Knot quality and connection hardware.
Reel drag consistency.
Rod and reel manufacturer specifications.
The weakest component often determines the practical limit of the setup. Match each part to the expected fishing pressure rather than focusing only on the rod or main line.
Rod Angle and Fighting Technique
Rod angle plays a major role in how the blank handles pressure. Even a heavy-duty trolling rod can break if an angler uses poor technique or creates excessive bending stress.
One common mistake is high-sticking, which occurs when an angler raises the rod too high while fighting a fish. This position can concentrate stress near the tip and upper blank instead of allowing the rod to distribute the load along its intended working curve.
To reduce the risk of rod failure:
Keep the rod within the manufacturer’s recommended fighting angle.
Use the reel and rod together to maintain steady pressure.
Avoid sudden, forceful lifts when the fish surges.
Let the drag release line when the pulling force requires it.
Use the boat, harness, or fighting chair correctly when the setup supports those methods.
Anglers should also account for boat movement, current, and sudden changes in line direction. These conditions can increase tension even when the reel’s drag setting remains unchanged.
The key takeaway: A heavy-duty trolling rod’s drag limit depends on its complete design and how you use it. Match rod power and construction with the reel, line, leader, and fishing technique. Follow manufacturer limits and test drag with a suitable scale before heading offshore. This approach helps you apply effective pressure while reducing unnecessary stress on your tackle.
How to Calculate the Right Drag Setting for a Trolling Rod
Choosing the right drag setting for a trolling rod helps you control powerful fish while reducing the risk of line breakage and tackle failure. Start with your fishing line’s actual breaking strength, then consider the rod’s specifications, reel capacity, leader strength, and fishing conditions.
A common starting guideline is to set drag at approximately one-third of the line’s actual breaking strength. However, this rule does not guarantee a safe setting for every heavy-duty trolling rod. Always check the manufacturer’s recommendations and adjust the pressure to suit your complete fishing setup.
Start With the Line’s Actual Breaking Strength
Before setting your reel’s drag, determine how much force your fishing line can withstand. The strength printed on the package provides a useful reference, but the line’s actual breaking strength may differ from its labeled rating.
Knots, swivels, snaps, and leader connections can also reduce the strength of your setup. Inspect these components and consider their limits when choosing a drag setting.
For offshore trolling, pay attention to the following factors:
Main-line strength: Check the rated and, when available, tested breaking strength of your monofilament or braided line.
Leader strength: Make sure the leader suits your target species and fishing conditions.
Knot strength: Poorly tied or improperly seated knots can become weak points under heavy tension.
Line condition: Abrasion, wear, and damage can reduce breaking strength.
Use the weakest relevant component as a key reference when evaluating your setup. A strong main line cannot compensate for a weak leader or connection.
Use the One-Third Rule as a Starting Point
The one-third rule provides a simple way to estimate an initial drag setting. It recommends starting at approximately one-third of the fishing line’s actual breaking strength.
Use this formula:
\[ \text{Starting drag} \approx \frac{\text{Line breaking strength}}{3} \]
For example, if your line has a verified breaking strength of 60 lb, one-third equals approximately 20 lb of drag.
This calculation offers a starting estimate, not a guaranteed safe setting. Your rod may not safely handle 20 lb of drag in every position. Leader strength, knot efficiency, reel performance, and fishing conditions can also affect the appropriate setting.
For heavy-duty offshore trolling, use the one-third rule as a reference rather than a fixed requirement. You may need to start with less pressure if your rod, leader, or other components have lower limits. Follow the equipment manufacturer’s guidance before increasing drag.
Check the Rod and Reel Manufacturer’s Recommendations
Your rod and reel must work together within their intended specifications. A reel may produce more drag than your rod or line connections can safely manage, so never choose a setting based on the reel’s maximum drag alone.
Before heading offshore, check:
Rod specifications: Confirm the recommended line class and intended fishing application.
Reel specifications: Review the drag system’s capabilities and operating recommendations.
Leader and terminal tackle: Check that hooks, swivels, snaps, and knots can withstand the expected load.
Fishing technique: Consider how rod angle, boat movement, and fighting style affect tension.
For example, a 130 lb trolling rod does not automatically support 130 lb of drag. Its line rating describes its intended line class, not its maximum allowable drag pressure. The manufacturer’s specifications and the complete setup determine a suitable working range.
Measure Drag With a Scale
Measuring drag with a suitable scale gives you a more reliable starting point than estimating tension by feel. A fishing scale can help you verify how much force the reel applies as line leaves the spool.
Follow these steps:
Set up your tackle. Thread the line through the guides and connect it to a suitable scale using a secure connection.
Position the rod safely. Hold it at a controlled angle that follows the manufacturer’s recommendations. Avoid bending the tip sharply toward the line.
Pull steadily. Have a helper pull the scale smoothly to draw line from the reel. Avoid sudden jerks that can produce misleading readings.
Check the reading. Observe the force required to make the drag release line. Repeat the test to check for consistent performance.
Adjust gradually. Increase or decrease the drag in small increments, then test again. Stay within the limits of every component.
Keep your hands and face clear of the loaded line, hooks, and scale connections. Heavy tackle can store considerable energy under tension, so use appropriate equipment and avoid testing beyond the system’s safe limits.
Example: Calculating a Starting Drag Setting
The following examples show how the one-third guideline translates into an initial estimate.
| Actual line breaking strength | Approximate starting drag |
| 30 lb | 10 lb |
| 50 lb | 16.7 lb |
| 60 lb | 20 lb |
| 80 lb | 26.7 lb |
| 100 lb | 33.3 lb |
| 130 lb | 43.3 lb |
These figures illustrate the calculation only. They are not recommended drag settings for every rod in the corresponding line class. A rod’s line rating does not establish its safe drag limit, and the line’s actual breaking strength may differ from its nominal rating.
The key takeaway: Calculate a starting point from your line’s actual breaking strength, verify it with a scale, and check the limits of your rod, reel, leader, and connections. For heavy-duty trolling, the goal is not to maximize drag. It is to apply enough controlled pressure to fight the target fish without overloading your tackle.
How Much Drag Do You Need for Tuna, Marlin, and Other Big Game Fish?
The right drag setting depends on the target species, fish size, line strength, and fishing conditions. Tuna, marlin, and sharks can make powerful runs that place sustained pressure on your trolling rod, reel, and line. Medium-sized offshore species, such as mahi-mahi, often require less drag and a lighter setup.
Instead of setting drag as high as possible, build a balanced system that delivers enough pressure to control the fish without overstressing the tackle.
Tuna Fishing
Tuna fishing requires a drag setting that balances stopping power with line protection. Smaller tuna may respond well to moderate drag, while large yellowfin and bluefin tuna can demand a heavier setup and careful pressure management.
Consider these factors when setting drag for tuna:
Tuna size: Larger tuna generally require stronger tackle, but fish size alone does not determine the ideal drag setting.
Line class: Match the drag to the actual breaking strength of your main line and leader, not just the rod’s printed line rating.
Fishing depth: Deep-water fights can create sustained pressure and increase the time needed to bring a fish to the boat.
Long runs: Tuna may take substantial line during powerful runs. A controlled drag setting helps reduce sudden loads on the rod, knots, and hooks.
For example, a 50 lb line does not automatically require 50 lb of drag. A starting point near one-third of the line’s actual breaking strength is a common guideline, but the reel manufacturer’s recommendations and the limits of the complete setup should determine the final setting.
For large tuna, pair a suitable heavy-duty trolling rod with a reliable reel, adequate line capacity, and a drag system that maintains consistent pressure throughout a long fight.
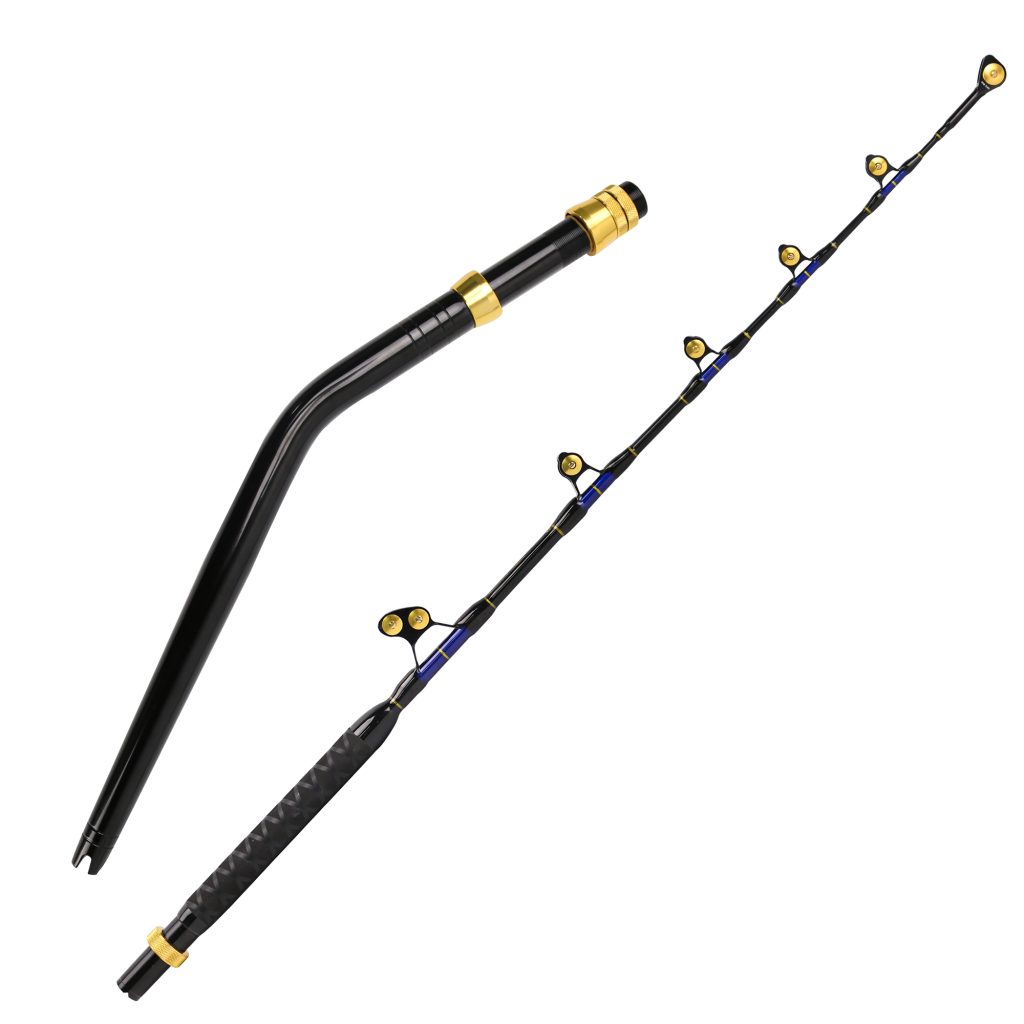
Marlin Fishing
Marlin fishing calls for controlled pressure rather than maximum drag. Marlin can make fast runs, jump repeatedly, and change direction quickly. These movements create sudden loads on the line, leader, hooks, and rod.
A suitable drag setting should help you maintain contact with the fish while allowing line to leave the reel during a powerful run.
Focus on three key considerations:
Controlled pressure: Set enough drag to maintain tension and work the fish, but avoid excessive resistance that could cause a line failure or damage tackle.
Hook security: Sudden increases in drag can pull hooks free, especially when the fish jumps or changes direction. Smooth, consistent pressure helps maintain a secure connection.
Long runs: Marlin can take a large amount of line in a short time. Make sure the reel has enough capacity and that the drag remains consistent as the fight continues.
Rod power, reel drag, line class, and leader strength must work together. A heavy-duty trolling rod can support demanding offshore fishing, but its strength does not determine the reel’s ideal drag setting on its own.
Always follow the tackle manufacturer’s specifications and adjust your approach to the fish, conditions, and applicable fishing regulations.
Shark Fishing
Shark fishing often involves prolonged fights and sustained pressure. Depending on the species and size, you may need a heavy-duty trolling rod, a suitable reel, strong line, and a leader designed for the intended target.
However, using the highest possible drag setting is not always the best approach.
Manage prolonged fights: Choose a drag setting that provides steady pressure without placing excessive strain on the rod, reel, knots, or line.
Use an appropriate leader: Leader strength and abrasion resistance matter when fishing for sharks. Check that the leader, connections, and hooks suit the target species and fishing conditions.
Control the total load: The rod, reel, main line, leader, and terminal tackle form one system. A weak connection or poorly matched component can fail even when the rod itself is strong.
Avoid excessive rod angles: Keep the rod within its recommended fighting angle. Raising it too high can concentrate stress on the blank and increase the risk of breakage.
For large sharks, select tackle based on the target species, expected fish size, and fishing method. Set the drag to match the weakest relevant component and the manufacturer’s recommendations rather than relying on rod power alone.
Mahi-Mahi and Other Medium-Sized Offshore Species
Mahi-mahi, wahoo, and other medium-sized offshore species do not always require the heavy drag settings used for large tuna or sharks. A lighter, balanced setup can provide better control, reduce unnecessary fatigue, and make the fight more manageable.
When choosing drag for these species, consider:
Target fish size: Match the rod, reel, and line to the fish you expect to encounter.
Fishing method: High-speed trolling, conventional trolling, and other techniques may place different demands on your tackle.
Hook and line strength: Excessive drag can straighten hooks, damage knots, or break lighter line.
Rod performance: A rod that loads properly under pressure can help absorb sudden movements and maintain line tension.
For example, a medium-heavy trolling rod with a properly matched reel may be more suitable for mahi-mahi than an extra-heavy rod with an unnecessarily high drag setting. The goal is to maintain control without sacrificing the balance and responsiveness of the setup.
The key takeaway: There is no universal drag setting for every offshore species. Start with the line’s actual breaking strength, consider the target fish and fishing conditions, and stay within the limits of the rod, reel, leader, and terminal tackle. A well-matched system usually performs better than one built around maximum drag alone.
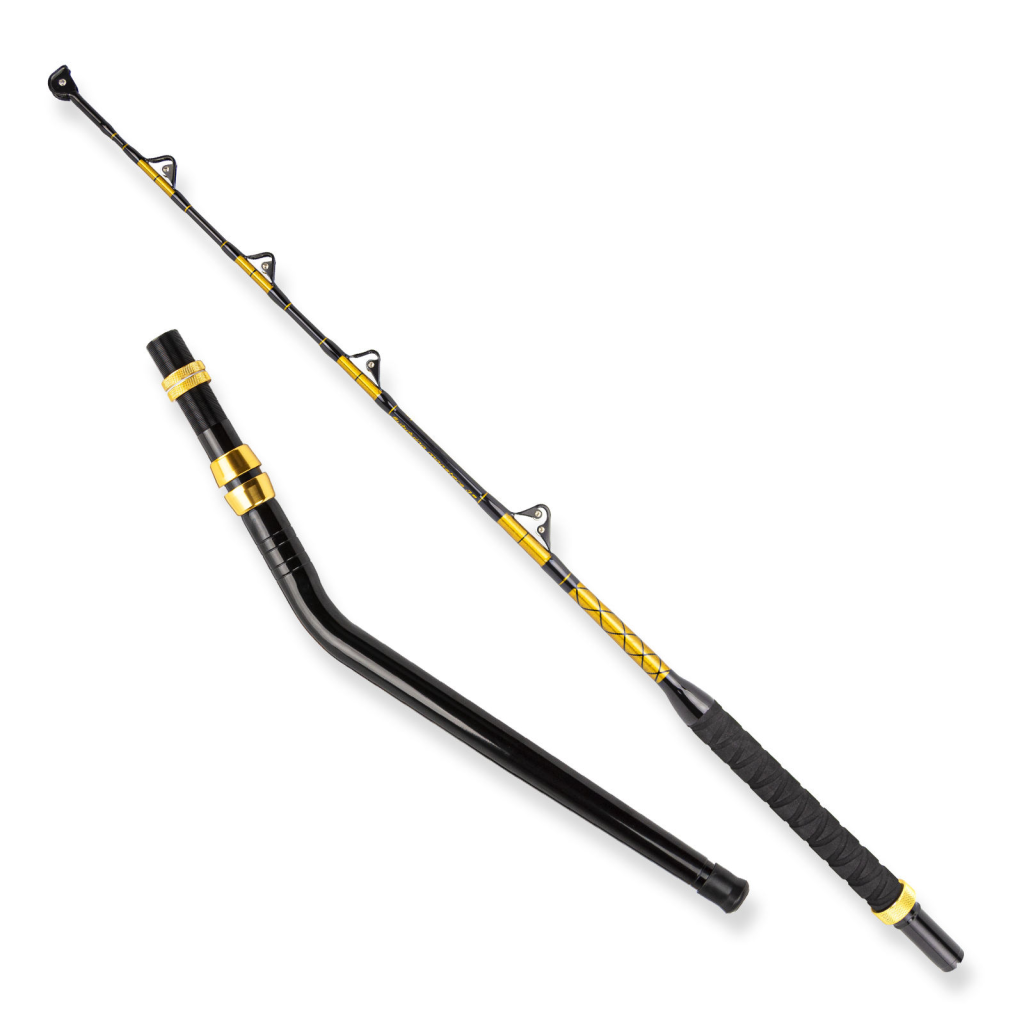
Signs That Your Trolling Rod or Tackle Is Under Too Much Pressure
A heavy-duty trolling rod can handle substantial loads, but every component has its limits. Excessive drag, poor rod handling, damaged tackle, or mismatched equipment can increase the risk of failure during a fight.
Watch for these warning signs. If you notice any of them, reduce the load when it is safe to do so and inspect your tackle before fishing again.
1. Excessive or Unusual Rod Blank Deformation
A trolling rod should bend under load, but the curve should remain consistent with its design and intended use. If the blank develops a sharp bend, a localized stress point, or an unusual twist, the rod may be under excessive pressure.
Avoid lifting the rod sharply or raising it beyond its recommended fighting angle. This practice, often called high-sticking, concentrates stress on the blank and can cause breakage.
2. Cracking Sounds, Damaged Guides, or Loose Reel-Seat Components
Unusual sounds or loose components can indicate structural damage. Pay attention to these signs:
Cracking or popping sounds: The blank or another component may have suffered damage.
Damaged guides: Bent frames, chipped inserts, or loose roller guides can damage the line and affect line movement.
Loose reel seat: A reel that shifts under load can compromise control and place extra stress on the mounting components.
Damaged butt or handle: Cracks, loose fittings, or movement around the rod butt can reduce stability during a heavy fight.
Do not continue fighting a fish with a suspected structural failure if you can safely reduce the load. Afterward, inspect the rod carefully and replace damaged components before using it again.
3. Drag That Sticks or Releases Inconsistently
A reliable drag system should release line smoothly and maintain consistent resistance. If the drag sticks, surges, or suddenly releases too much line, it may not provide predictable pressure.
Several factors can cause these problems, including worn drag components, salt buildup, contamination, or incorrect adjustment.
To reduce risk, avoid tightening the drag abruptly during a fight. Follow the reel manufacturer’s instructions to check and maintain the drag system. If the reel continues to behave inconsistently, service it before your next trip.
4. Damaged Knots, Stretched Leaders, or Repeated Line Failures
Line and leader problems often indicate excessive load, abrasion, poor connections, or unsuitable tackle. Check for these warning signs:
Damaged knots: Fraying, slipping, or broken connections may indicate poor knot tying or excessive strain.
Stretched or abraded leaders: Heat, friction, sharp surfaces, and prolonged loading can weaken leader material.
Repeated line breaks: Failures may result from an overloaded drag setting, damaged line, weak knots, or a mismatch between line strength and fishing conditions.
Flattened or visibly damaged line: This can signal contact with guides, rocks, other lines, or other abrasive surfaces.
Replace damaged line and leaders rather than assuming they can handle another fight. Check every connection and confirm that the main line, leader, hooks, and drag setting work together as a complete system.
5. How to Reduce Pressure Safely and Inspect Your Tackle
If your rod or tackle shows signs of excessive pressure, avoid sudden adjustments that could destabilize the fight. Prioritize control and follow safe handling procedures.
Ease the load carefully. If conditions allow, reduce drag gradually rather than making a sudden adjustment. Maintain control of the rod and reel.
Keep the rod at the recommended angle. Avoid high-sticking, jerking the rod, or using it to lift a heavy fish vertically.
Check the drag and line. After the fight, look for inconsistent drag performance, line damage, and weakened connections.
Inspect the rod and reel. Examine the blank, guides, roller assemblies, reel seat, handle, and butt for cracks, deformation, or loose components.
Repair or replace damaged parts. Do not return questionable tackle to service until you have checked it against the manufacturer’s maintenance and repair guidance.
After a demanding fight, rinse saltwater tackle with fresh water according to the manufacturer’s instructions, dry it thoroughly, and inspect it before storage. Do not assume that a rod remains safe simply because it did not break during the fight.
The key takeaway: A heavy-duty trolling rod needs more than a high line rating to handle demanding loads. Smooth drag performance, sound connections, proper rod handling, and regular inspection all help reduce equipment failure. When you match the rod, reel, line, and leader correctly, you can apply useful fighting pressure without pushing the entire system beyond its limits.
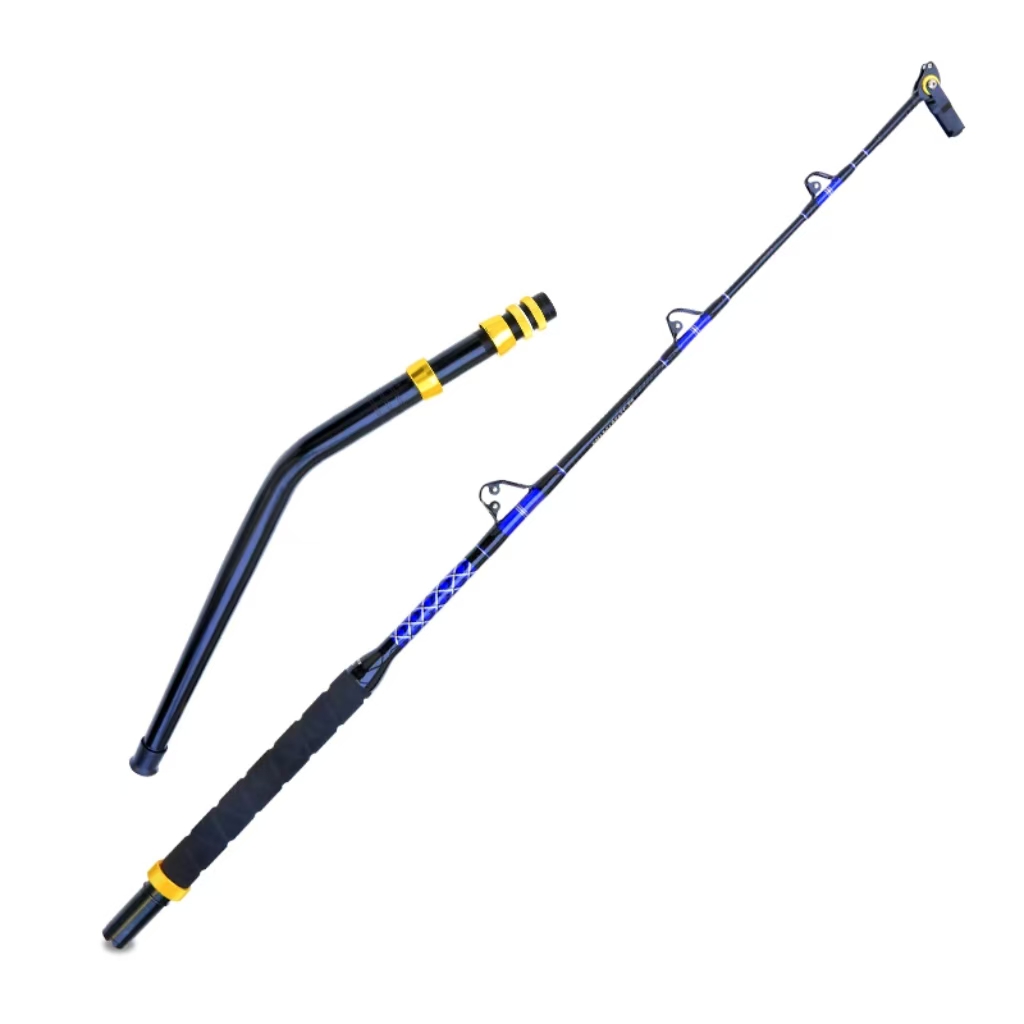
Common Mistakes When Setting Drag on a Heavy-Duty Trolling Rod
Setting the drag correctly helps you control powerful fish while protecting your rod, reel, and fishing line. However, many anglers focus only on reel specifications and overlook other parts of the tackle system. Avoid these common mistakes when setting drag on a heavy-duty trolling rod.
1. Setting Drag Based Only on the Reel’s Maximum Rating
A reel’s maximum drag rating shows its upper limit, not the ideal setting for every fishing situation. Setting the drag too high can overload the rod, damage line connections, or cause the line to break under sudden pressure.
Instead, start with a conservative drag setting and adjust it to match your line strength, target species, and fishing conditions. Always follow the rod and reel manufacturers’ recommendations.
2. Confusing Rod Line Class With Maximum Drag Capacity
A rod’s line class indicates the recommended line range for its intended use. For example, a 130 lb trolling rod is designed for use with a suitable line class, but this does not mean it can safely handle 130 lb of drag pressure.
Drag settings depend on the entire tackle system, including the rod, reel, main line, leader, knots, and terminal tackle. Match these components carefully rather than treating the rod’s line rating as its maximum drag capacity.
3. Ignoring Knots, Leaders, Hooks, and Other Connection Points
Your main line may have high breaking strength, but knots and connections can weaken the overall system. A poorly tied knot, undersized leader, or weak hook connection may fail before the rod or reel reaches its limits.
Check your knots, leader material, swivels, snaps, and hooks before heading offshore. Use reliable knots and properly matched components. Remember that the weakest connection often determines how much pressure your tackle can withstand.
4. Applying Excessive Drag to Stop Every Fish Immediately
Heavy drag does not always give you better control. Excessive pressure can cause line breakage, pull hooks free, or place unnecessary stress on the rod and reel. Powerful fish such as tuna and marlin may also make sudden runs that increase the load on your tackle.
Set the initial drag according to your line strength and the fishing conditions. Apply additional pressure when necessary, but avoid sudden adjustments while a fish is running. Let the rod, reel, and drag system work together to manage the fight.
5. Holding the Rod at an Unsafe Angle Under Heavy Load
Rod angle plays an important role in safe fish fighting. Raising a heavily loaded trolling rod too high can create excessive stress near the tip and increase the risk of rod failure. This problem, often called high-sticking, becomes especially dangerous when fighting large offshore fish.
Keep the rod at a controlled angle and use its intended fighting position. Let the rod bend through its working section instead of lifting the tip excessively. Follow the manufacturer’s guidance, particularly when using a heavy-duty rod with a bent butt or a fighting chair.
6. Failing to Test Drag Before Heading Offshore
A drag setting that feels correct by hand may behave differently under sustained pressure. Salt, dirt, worn drag washers, and inconsistent adjustments can affect performance. Discovering these problems during a fight with a large fish can lead to lost catches and damaged tackle.
Before each trip, inspect the reel and check that the drag engages smoothly. Use a suitable scale to measure the initial drag force, and test the system with the rod and line arranged safely. Confirm that the knots, leader, and terminal tackle can handle the planned load.
The key takeaway: Set drag according to the strength and limitations of your complete tackle system, not just one specification. A properly balanced setup helps you control powerful fish while reducing unnecessary stress on your heavy-duty trolling rod, reel, and line.
How to Choose a Heavy-Duty Trolling Rod for High-Drag Fishing
Choosing a heavy-duty trolling rod for high-drag fishing requires more than looking for the highest line rating or strongest blank. The rod must work with your reel, fishing line, leader, and drag settings to handle sustained pressure from powerful offshore fish. Consider the following factors to build a reliable setup for tuna, marlin, sharks, and other big-game species.
Match Rod Power to Target Fish and Line Class
Rod power determines how much force a rod needs to bend. Heavy and extra-heavy trolling rods suit large, powerful fish that require sustained pressure. However, the right power depends on your target species, expected fish size, line class, and fishing conditions.
Start by identifying the fish you plan to target. A medium-heavy or heavy rod may suit some tuna trolling applications, while large tuna, marlin, and sharks often require a heavier setup. Check the manufacturer’s recommended line class before choosing your rod.
Remember that line class does not equal maximum drag capacity. A 130 lb trolling rod is designed for a suitable line class, but that rating does not mean you should apply 130 lb of drag. Actual drag pressure depends on the complete tackle system and the rod’s design.
Choose a Compatible Trolling Reel and Drag System
A heavy-duty trolling rod needs a reel that can deliver smooth, consistent drag under sustained load. A powerful reel with an unsuitable drag system can create an unbalanced setup and make fish harder to control.
When comparing trolling reels, consider these key features:
Drag performance: Choose a system that applies consistent pressure without sudden sticking or surging.
Drag range: Ensure the reel provides the working drag range your target species and line setup require.
Line capacity: Select enough capacity for your main line and the long runs expected from offshore fish.
Gear ratio: Consider retrieve speed and cranking power. A two-speed reel can offer a lower gear for fighting powerful fish and a higher gear for retrieving line.
Corrosion resistance: Look for suitable materials, protective finishes, and components designed for saltwater use.
Do not choose a reel based on maximum drag alone. Its usable drag range, line capacity, gearing, and compatibility with the rod matter just as much.
Compare Fiberglass, Carbon Fiber, and Composite Blanks
Blank material affects how a trolling rod handles heavy loads, repeated bending, and long fights. Consider the advantages and limitations of each material before making a purchase.
| Blank material | Main advantages | Considerations |
| Fiberglass | Durable, flexible, and well suited to sustained loading | Usually heavier than comparable carbon fiber rods |
| Carbon fiber | Lightweight, responsive, and offers high stiffness for its weight | Can be more vulnerable to impact damage, depending on construction |
| Composite | Combines characteristics of fiberglass and carbon fiber | Performance varies with material proportions and blank design |
For high-drag trolling, fiberglass often suits anglers who prioritize durability and a forgiving bend. Carbon fiber may appeal to those who want reduced weight and greater responsiveness. Composite blanks can offer a practical balance between the two.
However, material alone does not determine a rod’s strength. Blank diameter, wall thickness, resin system, reinforcement, and overall construction also affect load capacity. Review the manufacturer’s specifications and intended application rather than assuming one material always performs better.
Consider Roller Guides, Butt Design, and Boat Setup
Rod components influence how effectively you can manage heavy line pressure during an offshore fight.
Guide system: Roller guides can reduce friction as heavy line moves through the guides under load. They are common on many big-game trolling rods. Standard guides may offer a simpler, lighter option for other applications. Choose a guide system that matches your line type, expected load, and maintenance preferences.
Butt design: A bent-butt rod often works well with a compatible trolling reel and fighting chair or harness setup. It helps position the rod for certain heavy-tackle fighting techniques. A straight-butt rod offers a different handling profile and may suit anglers who prefer more versatile positioning.
Boat setup: Consider your rod holders, cockpit space, outrigger arrangement, and fighting position. A shorter rod may provide better leverage in confined spaces, while a longer rod can help separate lines and spread trolling lures. Make sure the rod fits your boat and intended trolling method.
Also check the reel seat, handle, and butt fittings. These components must withstand the forces generated during a prolonged fight.
Build a Balanced System Instead of Chasing Maximum Drag
High-drag fishing requires coordinated performance across the entire tackle system. A rod with an impressive line rating will not compensate for a reel with inconsistent drag, a weak leader connection, or an unsuitable fighting technique.
Build your setup around the fish and conditions you expect to encounter. Match the rod’s power and line class to the main line, then select a reel with an appropriate drag range and sufficient line capacity. Check that the leader, knots, swivels, and hooks can handle the planned pressure.
Your fighting technique matters, too. Avoid sudden drag adjustments, excessive rod angles, and attempts to stop every fish immediately. Apply controlled pressure and let the rod and reel work together.
Before purchasing, use this practical checklist:
Target species: Identify whether you plan to catch tuna, marlin, sharks, or other offshore fish.
Expected fish size: Estimate the typical size and fighting strength of your target fish.
Line and leader: Choose suitable breaking strengths and reliable connections for the intended application.
Rod specifications: Confirm rod power, line class, length, blank material, guides, and butt design.
Reel drag: Check the usable drag range, smoothness, line capacity, and gear system.
Fighting technique: Consider your boat setup, rod-holder arrangement, harness or fighting-chair use, and ability to maintain controlled pressure.
Ultimately, the best heavy-duty trolling rod for high-drag fishing is not necessarily the one with the highest rating. It is the rod that works reliably with the rest of your tackle and suits your target species, fishing environment, and fighting style.
Frequently Asked Questions
Can a Heavy-Duty Trolling Rod Handle 20 lb of Drag?
Yes, some heavy-duty trolling rods can handle 20 lb of drag, but the answer depends on the rod’s design, line class, and intended application. Check the manufacturer’s recommended drag range and ensure your reel, line, leader, and connections can handle the load. Do not assume every heavy-duty rod can safely support the same drag pressure.
Is a 130 lb Trolling Rod Suitable for 30 lb of Drag?
A 130 lb trolling rod may suit a 30 lb drag setting if the manufacturer approves that load and the complete tackle system supports it. The 130 lb rating typically refers to the recommended line class, not the rod’s maximum drag capacity. Verify the rod’s specifications and consider the rod angle and fighting technique before applying sustained pressure.
Does a 130 lb Line Rating Mean the Rod Can Handle 130 lb of Drag?
No. A 130 lb line rating does not mean the rod can safely handle 130 lb of drag. Line class identifies the intended line range for the rod, while drag measures the resistance the reel applies to the line. Excessive drag can overload the rod, damage connections, or break the line.
How Much Drag Should I Use for Tuna Fishing?
The correct drag setting depends on the tuna species, fish size, line strength, tackle configuration, and fishing conditions. A common starting guideline is around 20–30% of the line’s actual breaking strength, but you must also consider knot strength, leader strength, and the manufacturer’s recommendations. Use a scale to measure drag pressure and adjust it to suit your setup and fighting technique.
Is Maximum Reel Drag the Same as Usable Drag?
No. Maximum drag is the highest resistance a reel can provide under specified conditions, while usable drag is the pressure you can apply effectively and consistently during fishing. A reel may reach its maximum rating but perform less smoothly at that setting. For offshore trolling, prioritize consistent drag performance within the reel manufacturer’s recommended operating range.
Can Too Much Drag Break a Heavy-Duty Trolling Rod?
Yes. Excessive drag can overload a heavy-duty trolling rod, especially when the angler raises the rod too high or allows the line to pull from an unfavorable angle. It can also cause line breakage, pulled hooks, or failed knots. Stay within the manufacturer’s recommendations and maintain a controlled rod angle when fighting powerful fish.
How Do You Test Drag Pressure on a Trolling Reel?
Use a suitable spring scale or digital fishing scale to measure the force required to pull line from the reel. Secure the setup, thread the line through the rod guides, and pull steadily while keeping the rod at a safe working angle. Check the initial drag and confirm that the reel releases line smoothly without sticking or surging. Keep your hands clear of moving line, and never test beyond the rated limits of your tackle.
Final Thoughts: Match Drag Pressure to the Entire Trolling Setup
There is no universal drag limit for all heavy-duty trolling rods. The right drag pressure depends on the rod’s design, line class, reel capacity, line and leader strength, and target species. A higher rod line rating or maximum reel drag does not automatically mean you can apply more pressure safely.
For reliable offshore performance, treat your rod, reel, main line, leader, knots, and terminal tackle as one complete system. Match the rod’s power to your target fish, choose a reel with smooth and consistent drag, and use a fighting technique that maintains controlled pressure. Avoid excessive drag and unsafe rod angles, especially when fighting powerful tuna, marlin, and sharks.
Always follow the manufacturer’s specifications and measure actual drag pressure with a suitable scale instead of relying on estimates alone. Test your setup before heading offshore, and adjust it to suit your fishing conditions.
Looking for dependable equipment for big-game fishing? Explore Topline heavy-duty offshore trolling rods to find options for demanding saltwater applications. Choose a rod that matches your target species, line class, and overall tackle setup for confident, controlled offshore fishing.
-
Sale!

-
Sale!

-
Sale!

-
Sale!
